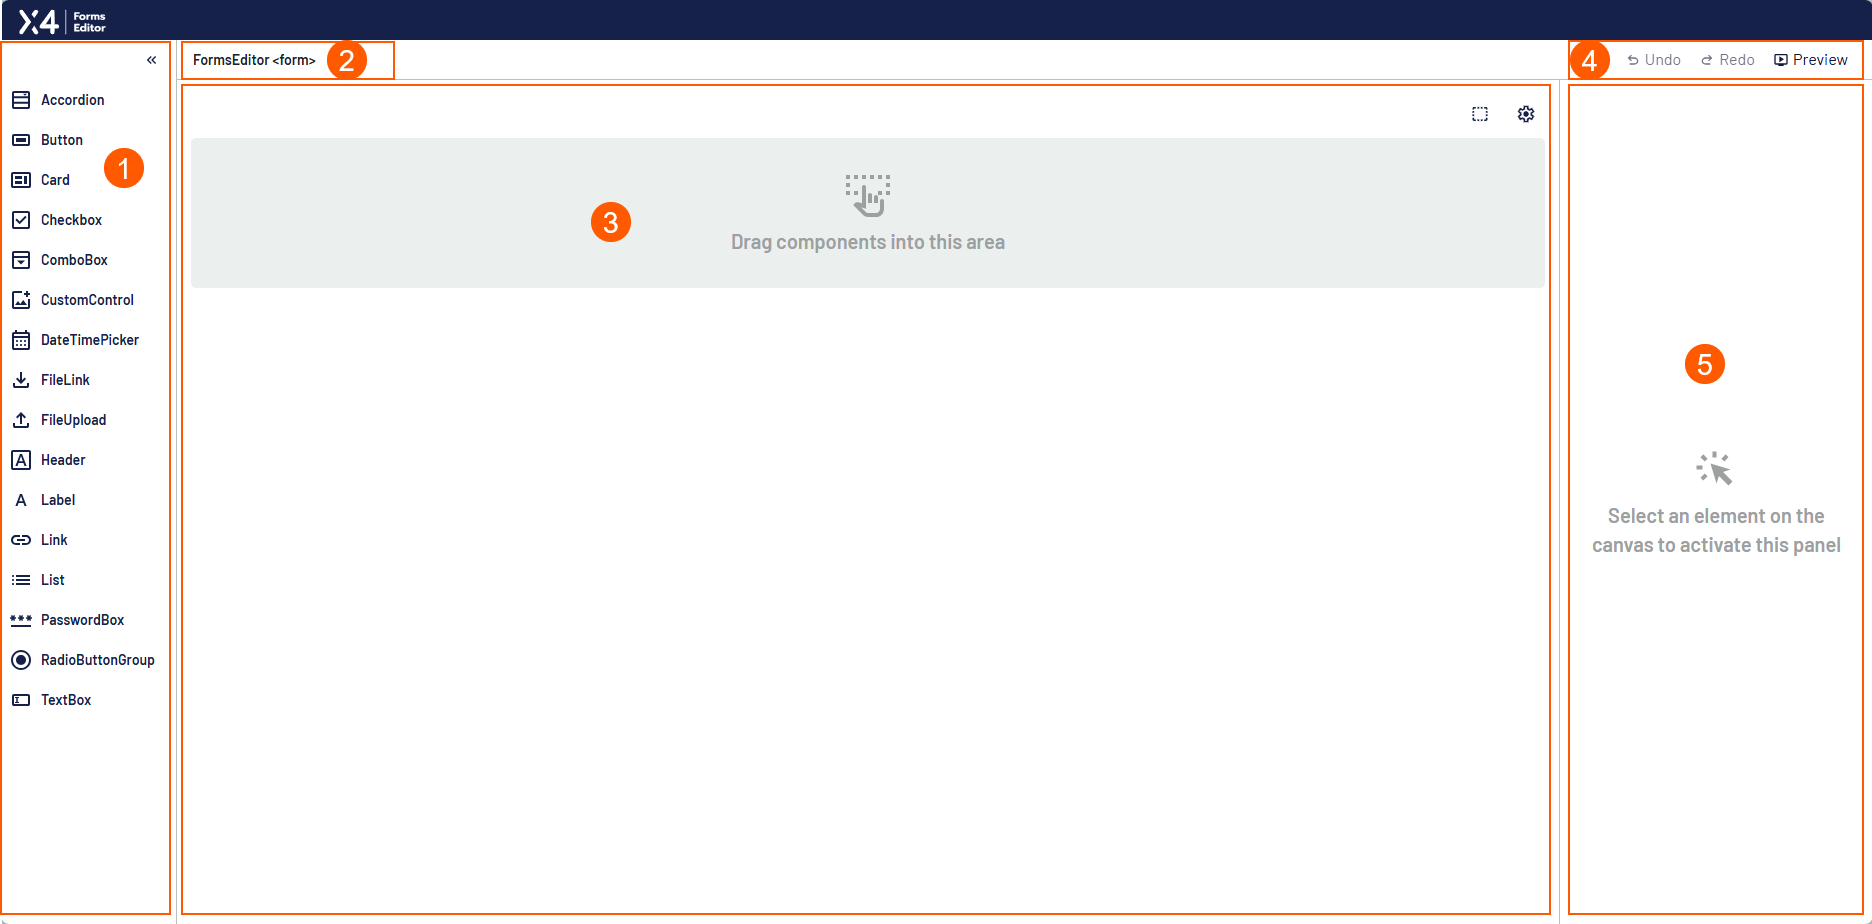
After opening an empty Form Component, the Forms Editor displays the following interface with the main areas:
|
1 |
Tool area |
List of controls that you can drag and drop into the form area. |
|
2 |
Form details |
Name of the X4 project and name of the |
|
3 |
Form area |
Here you design your form with controls from the tool area.
|
|
4 |
Toolbar |
|
|
5 |
Configuration area |
Here you define the attributes for the individual controls. The area is activated when you select an element in the form area. |
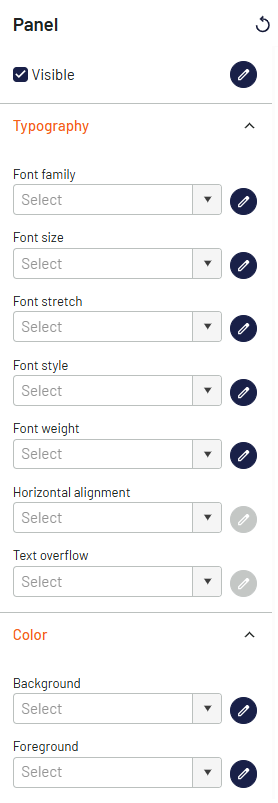
Configuring the form area
Use ![]()
|
Element |
Description |
|---|---|
|
|
Reset the user-defined configuration |
|
|
Select whether you want to select a static value or a data binding expression. When you select Data binding, the icon changes to |
|
Visible |
Show or hide the entire form in the Web App |
|
Typography |
Define font and alignment attributes |
|
Color |
Define attributes for the background and foreground color |
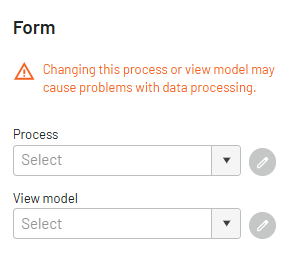
Configuring the form
Use ![]()
|
Element |
Description |
|---|---|
|
Process
|
Select an X4 process from your X4 project Note: The drop-down list displays not only processes, but also process folders and resources contained in the processes, such as XML files. |
|
View model
|
Select a |