The X4 Designer requires access to a token without using a client secret. Therefore, a separate public client must be created in Keycloak. The existing X4 client is a private client and therefore not suitable for this use case.
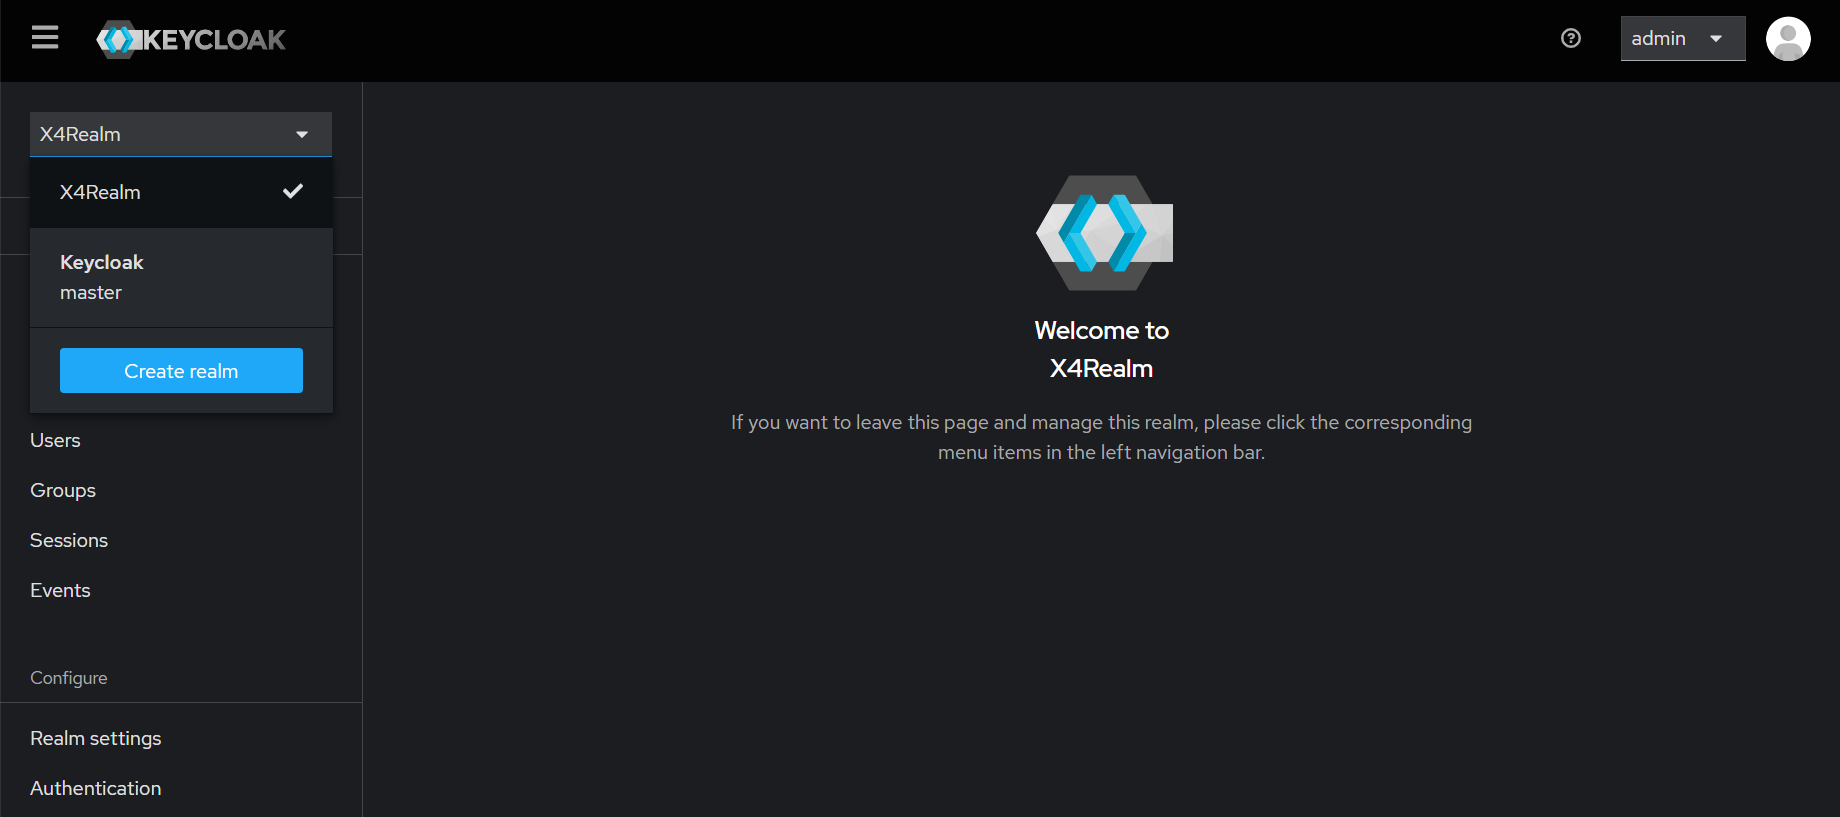
Setting up X4Realm
Select one of the following variants to set up the Keycloak realm.
Note:
Choose Variant A if you have an empty Keycloak instance. Choose Variant B if you have customized your Keycloak instance or if importing data appears too cumbersome. Then continue with Establishing a connection in the X4 Designer.
Variant A: Importing the predefined realm (recommended for new installations)
-
Start your current Keycloak instance.
-
If necessary, delete an existing realm named
X4Realm.
If you do not want to delete the realm, use Variant B.
-
Stop Keycloak (optional for security).
-
Restart Keycloak.
-
Log in to the Administration Console.
-
Select Create Realm and upload the file X4Realm-realm.json in the Resource file area.
-
Select Create.
→ After the import, the X4Designer client is available in the new realm X4Realm.
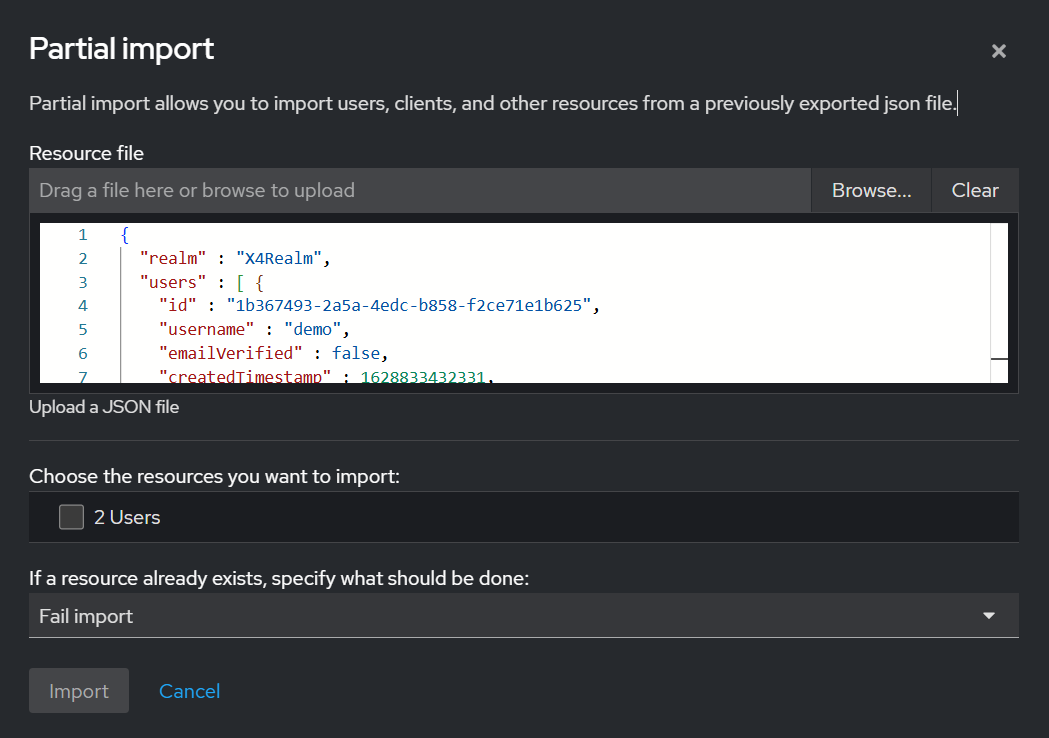
Importing sample user (demo)
-
Navigate to X4Realm > Realm settings.
-
In the Action drop-down list at the top right , select Partial Import.
-
Upload the fileX4Realm-users-0.json.
-
In the If a resource already exists, specify what should be done: drop-down list, select Overwrite if the user already exists.
-
Select Import.
→ The user demo is now available with the required roles.
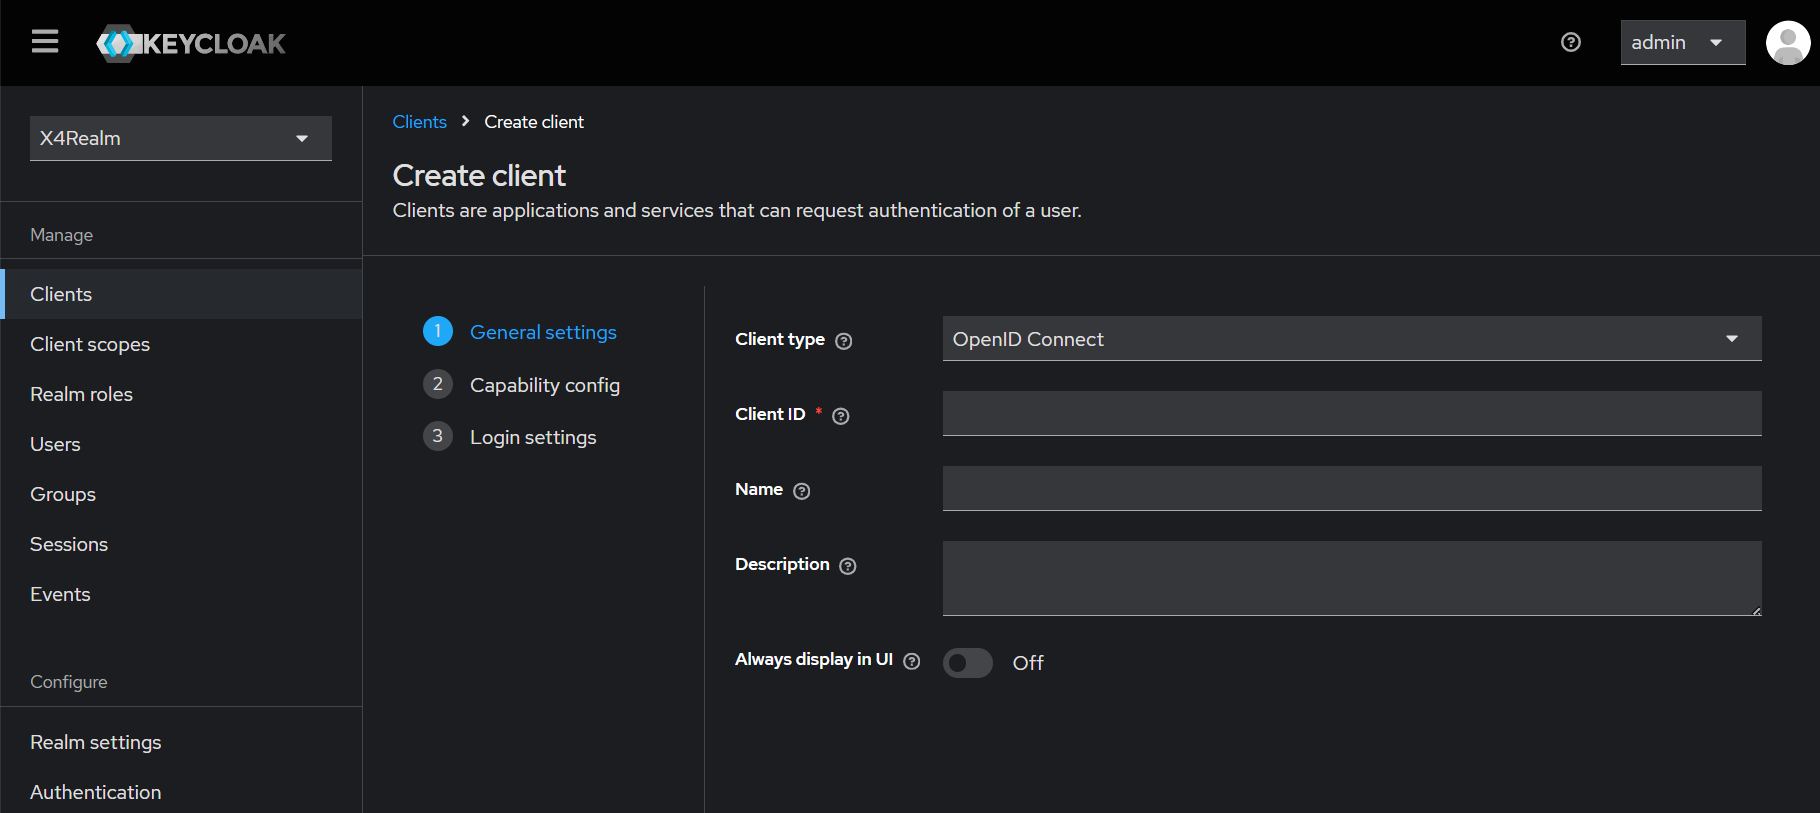
Variant B: Manual client entry (for existing or customized realms)
-
In the existing realm (e.g.
X4Realm), navigate to Clients. -
Select Create Client to create a client with the following settings:
-
General settings:
Client ID:X4Designer -
Capability config:
Client authentication: disabled
Authentication flow: Standard flow -
Login settings:
Valid redirect URIs:X4designer://redirect
-
-
Select Save.
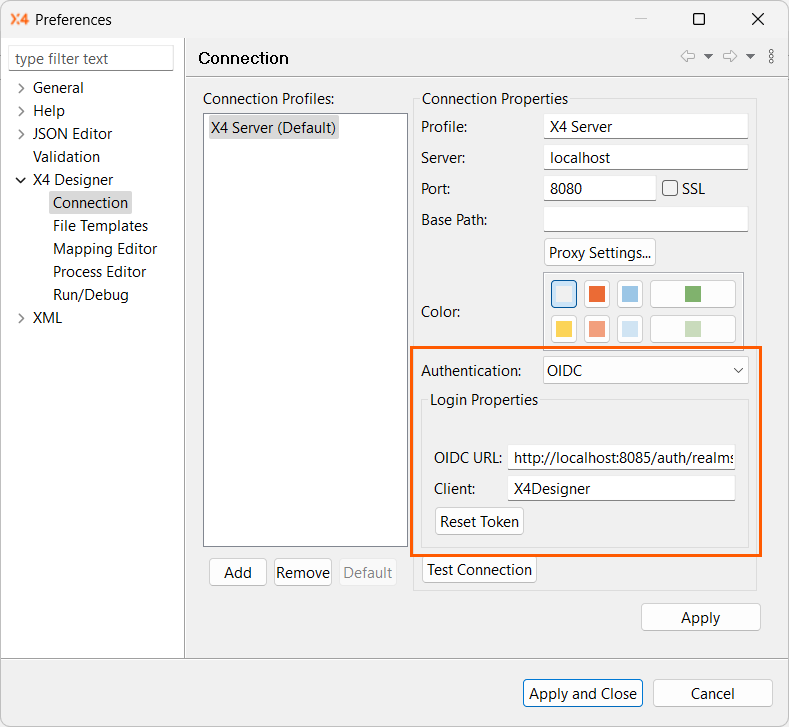
Establishing a connection in the X4 Designer
-
In the X4 Designer, select

⇾ The X4 Preferences dialog opens. -
On the left, expand X4 Designer and select Connection to access the connection settings.
-
In the Authentication drop-down list, selectOIDC.
-
In the Login Properties section, make the following settings:
|
Setting |
Value |
|---|---|
|
OIDC URL |
|
|
Client ID |
|
Alternatively, the authentication via Basic Authentication is still possible. To do this, select Basic from the Authentication drop-down list.
Connecting the X4 Server with Keycloak
In order for the X4 server to authenticate itself to Keycloak, the following configuration files must be present in the server's configurations folder:
Make sure that these files are configured correctly and placed in the correct directory.