Note:
You can request the BAM Logging adapter from our support team at the SoftProject website under X4 BPMS > Downloads. Go to the desired X4 BPMS Release, open the X4 Plugins tab, and select the Request button next to the plugin description.
The BAM Logging adapter requires a database configuration and manual adapter installation.
How to configure the database
-
In the
<server_directory>/configurationsfolder, create thebam_log_configuration.xmlfile. -
Insert the following content.
XML<?xml version="1.0" encoding="UTF-8"?> <Configuration> <ConnectionString>jdbc:postgresql://localhost:5432/postgres</ConnectionString> <!--OPTIONAL--> <JndiDatasource>java:/X4TEST_DS</JndiDatasource> <UserName>postgres</UserName> <Password>postgres</Password> <KeepLogs> <Duration>10</Duration> <TimeUnit>DAYS</TimeUnit> </KeepLogs> <RunCleanUp> <Duration/> <TimeUnit/> </RunCleanUp> <WriteAsync>true</WriteAsync> <asyncQueueSize>65536</asyncQueueSize> </Configuration>
-
Save the
bam_log_configuration.xmlfile.
Description of the elements in the database
|
Element |
Description |
Possible values |
|---|---|---|
|
|
JDBC connection string for the connection to the database For more information, see the official JDBC database documentation.
|
|
|
|
Name of the JNDI datasource to be used to establish the database connection. The JNDI datasource is configured directly in the Note:
For more information about setting up a JNDI datasource, see the WildFly documentation. |
|
|
|
User name for the login to the database |
|
|
|
Password for the login to the database |
|
|
|
Configuration for synchronous or asynchronous logging |
|
|
|
Size of the asynchronous logging queue When the queue is full, the process waits for the BAM logs to be queued. If the server shuts down or crashes, all BAM logs in the queue are lost.
|
|
KeepLogs
|
Element |
Description |
Possible values |
|---|---|---|
|
|
Time span |
|
|
|
Unit of the time span |
|
RunCleanUp
|
Element |
Description |
Possible values |
|---|---|---|
|
|
Time span |
|
|
|
Unit of the time span |
|
How to install adapters manually
-
Unzip the adapter's ZIP folder.
-
Copy the adapter folder into the
<server_directory>\wildfly\modules\de\softproject\x4\adapterfolder. -
Make sure the
<resource-root path="" />paths in the<resources>element in themodule.xmlfile in the<server_directory>\wildfly\modules\de\softproject\x4\adapter\<name of the adapter>\mainfolder match the names of the*.jarfiles.
Example using the BAM Log adapter:-
Names of
*.jarfiles: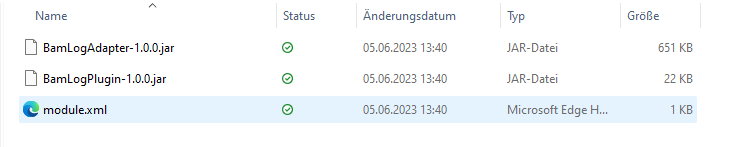
-
Contents of the
module.xmlfile:
-
-
Add the name of the adapter to the
module.xmlfile in the<server_directory>\wildfly\modules\de\softproject\plugins\mainfolder:-
Open the
module.xmlfile in the<server_directory>\wildfly\modules\de\softproject\plugins\mainfolder. -
Copy the plugin name into the
<dependencies>tag:<module name="de.softproject.x4.adapter.<name of the adapter>" export="true"/> -
Save the
module.xmlfile.
-
-
Launch Keycloak, the X4 Server, and the X4 Designer.
The adapter can now be selected and used in the X4 Designer.