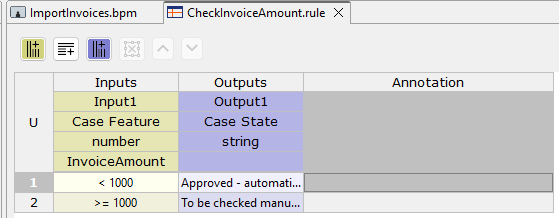
In this step, you add a rule to your process. You define the rules to be applied in a decision table (.rule). For this example, you create a decision table that determines the following:
-
All invoices with an invoice value below 1000 will be automatically confirmed.
-
All invoices with an invoice value greater than or equal to 1000 will be checked manually.
Previous step: Inserting the First Intermediate Event
Prerequisites:
You have defined business process data. For more information, see Defining Business Process Data.
Creating a decision table
-
Right-click the BPM Project in the Projects view and select New > Rules….
The File Creation Wizard dialog opens. -
In the File name text field, enter the name
CheckInvoiceAmount.rulefor your decision table. -
Click Finish.
✅ The decision table is created in the BPM Project and opens automatically in the editor. -
Select the
Case Featurevalue as theInputand selectInvoiceAmountin the /Data/Input 1 field. -
Enter the value
<1000in the Input column of the first row of the table. -
Click the

✅ A new table row is added below the current row. -
Enter the value
>=1000in theInputcolumn of the second row of the table. -
Select the
Case Statevalue as theOutput. -
Select the
Approved - automaticallyvalue in theOutputcolumn of the first row of the table. -
Select the
To be checked manuallyvalue in theOutputcolumn of the second row of the table. -
Click
-
Return to the
ImportInvoicesBPM Project.
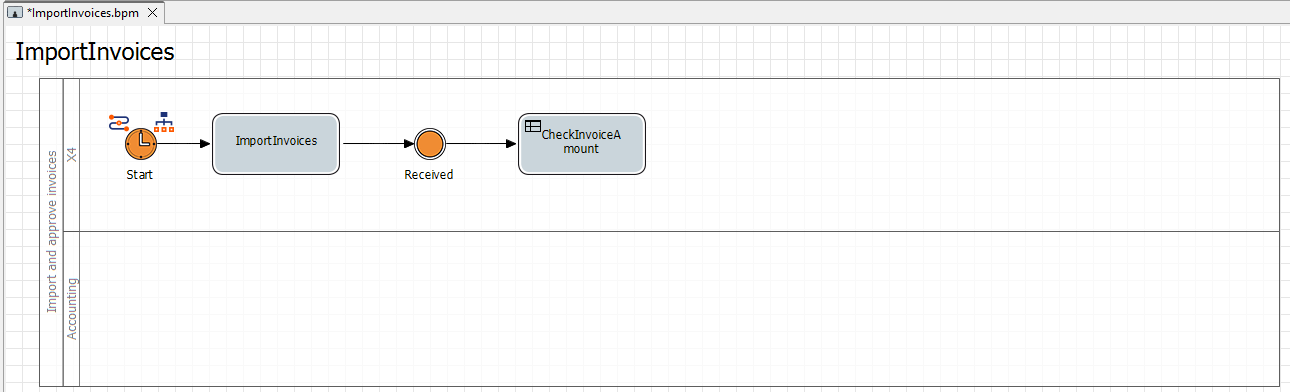
Inserting the rule
-
Drag the

Ruleelement from the Palette view next to the
Receivedelement in the top lane of the pool. -
In the Label field in the Properties view, define the name
CheckInvoiceAmountfor theRuleelement. -
Click the

The Choose Rule Input dialog opens. -
Select the previously created
CheckInvoiceAmount.ruleRULE file. -
Click on the lower right

Receivedelement, hold down the mouse button, and drag a connection to the Ruleelement.