Inserting an Exclusive Gateway and Defining the Execution Conditions
In this step, you will add another exclusive gateway to your process. After the human task has been performed, that is, a user has manually approved an invoice, the process can follow one of two paths: The invoice is manually accepted and then automatically forwarded, or the invoice is manually rejected and thus not forwarded.
Previous step: Creating and Defining a Human Task
Inserting an exclusive gateway
From the Palette view, drag the
Exclusive Gateway (Forking)element next to the
ApproveOrDeclineInvoice.humantaskelement in the bottom lane of the pool.Click on the lower right
corner of the
ApproveOrDeclineInvoice.humantaskelement, hold down the mouse button and drag a connection to theExclusive Gateway (Forking)element.Click on the lower right
Exclusive Gateway (Forking)element, hold down the mouse button and drag a connection to theCreateTransferRequestelement.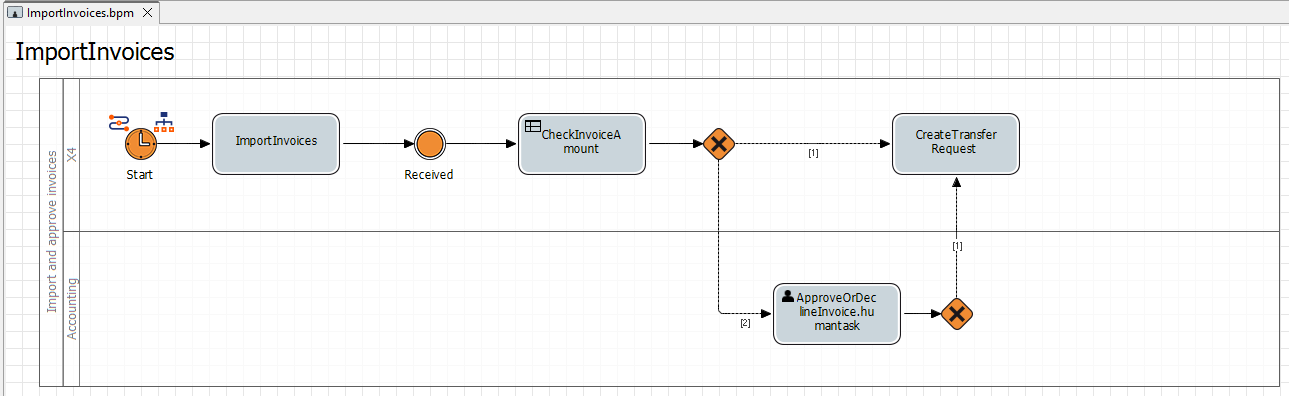
Setting the execution condition
Double-click the
Exclusive Gateway (Forking)element in the editor.
The Condition Editor opens.
The connection between theExclusive Gateway (Forking)element and theCreateTransferRequestactivity is automatically selected and highlighted in red in the Condition Editor.Enter the following condition in the Edit Condition section:
If result ofcase_STATEis=Approved - manually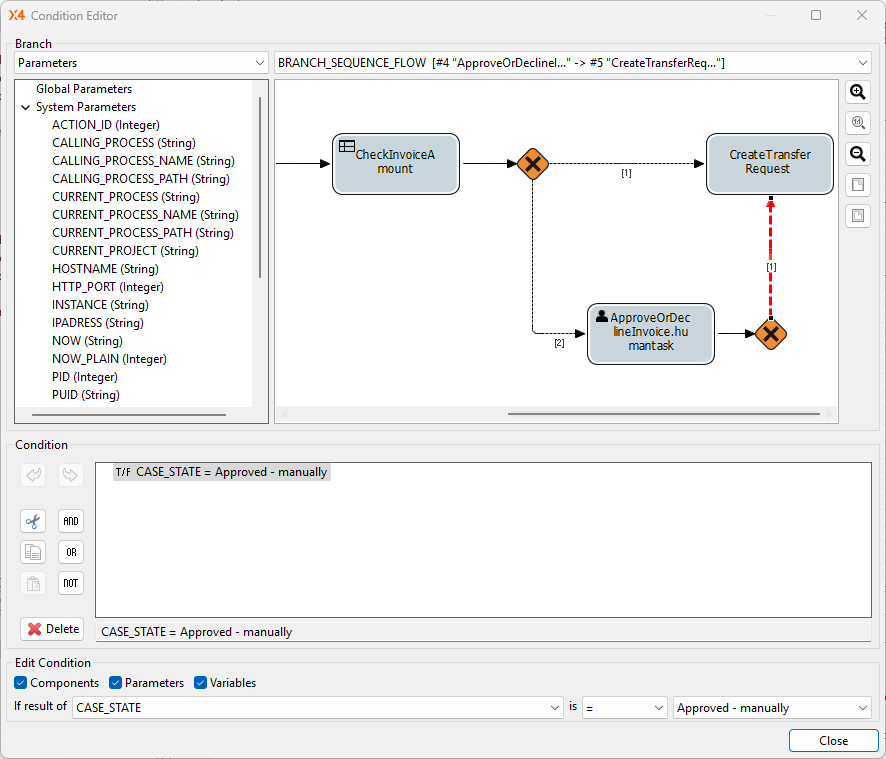
Select Close.
Select
Save.