Inserting End Points and Defining Execution Conditions
In the final step, you define the end point of your process. For this example, you use the End elements of the None End type, that is, general end events. Moreover, you define one of the end points as an end point for the second execution condition of the inserted exclusive gateway.
Inserting end points
Drag the

None Endelement from the Palette view next to the
CreateTransferRequestelement in the top lane of the pool.Define a new name for the end point in the Label field in the Properties view, e.g.
Sent to accounting.Click on the lower right
corner of the
CreateTransferRequestelement, hold down the mouse button, and drag a connection to theSent to accountingelement.Drag the
None Endelement from the Palette view next to the
Exclusive Gateway (Forking)element in the bottom lane of the pool.Define a new name for the end point in the Label field in the Properties view, e.g.
Declined - manually.Click on the lower right
Exclusive Gateway (Forking)element, hold down the mouse button, and drag a connection to theDeclined - manuallyelement.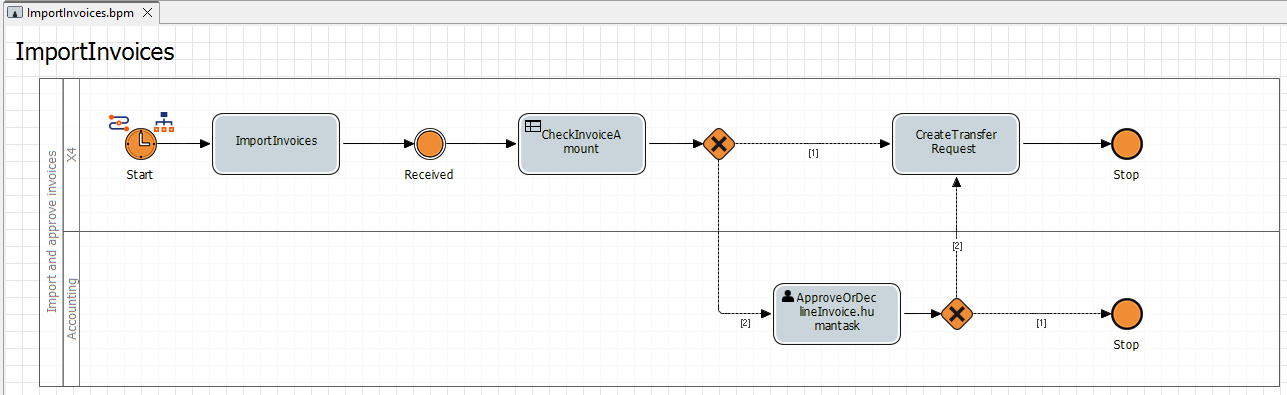
Defining execution conditions
Double-click the
Exclusive Gateway (Forking)element in the editor.
TheCondition Editoropens.
The connection between theExclusive Gateway (Forking)element and theDeclined - manuallyelement is automatically selected and highlighted in red in the Condition Editor.Enter the following condition in the Edit Condition section:
If result ofCASE_STATEis= Declined - manually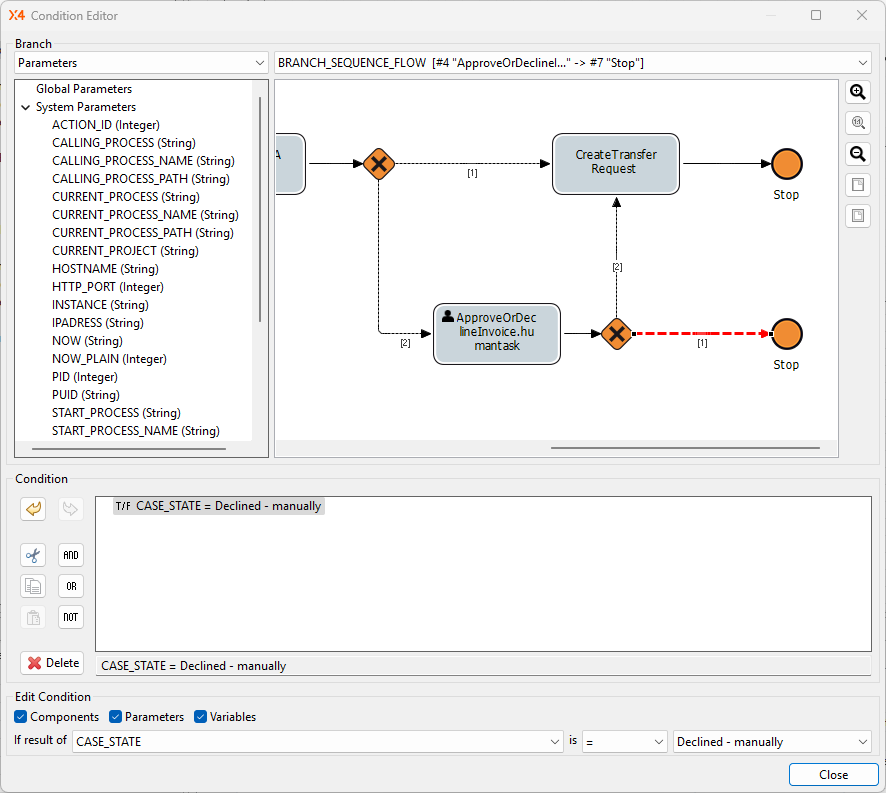
Click Close.
Click
 Save.
Save.
Next step: Result: BPM Project