(Optional) Creating and Inserting a Case Management Adapter
This step is only necessary if you want to integrate the Technical Process into a BPM process. Otherwise, continue with the next step here: ▶️Inserting an End Point .
In this step, you insert another adapter into your Technical Process to transfer the required business data structure for a Business Process into a domain-model file (.domainmodel).
For this example, you need the Case Management adapter. This adapter represents the interface to the "Case Management" functions of the X4 BPM product component. For more information, see Case Management.
With this adapter, the information read from the invoice documents is supposed to be recorded as features in a BPM process using the SetFeatures operation.
We also recommend that you include descriptions of your Technical Process that explain each process step. This way, the individual process steps remain transparent and can also be quickly followed up by new colleagues.
Previous step: Creating, Inserting, and Configuring a Mapping
Creating the adapter
Right-click on the Technical Process in the Projects view and select New > Adapter….
The File Creation Wizard dialog opens.Enter the value
Case Managementin the search field and select the Case Management adapter.
If necessary, you can customize the name of the adapter in the File name field.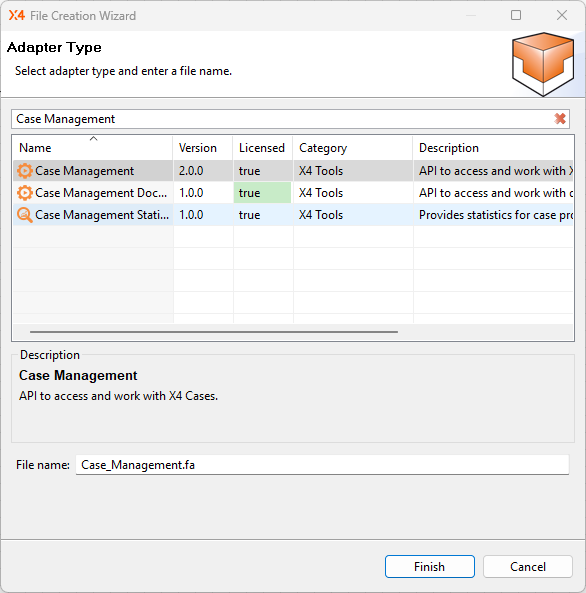
Click Finish.
✅ The adapter is created in the ESB Project and opens automatically in the editor. For this example, you do not need to configure the inserted adapter further.Return to the Technical Process
ImportInvoices.wrf.
Inserting the adapter and selecting the operation
Drag the
 element from the Palette view next to the
 Stylesheet: ExtractCaseFeatureselement in the editor.Double-click the
element.
The Choose Adapter File dialog opens.Select the adapter previously created in the Technical Process.
Click OK.
Select the value
SetFeaturesas theOperationin the Properties view.Click the lower-right
 corner of the
 Stylesheet: ExtractCaseFeatureselement, hold down the mouse button, and drag a connection to the
Case_Managementelement.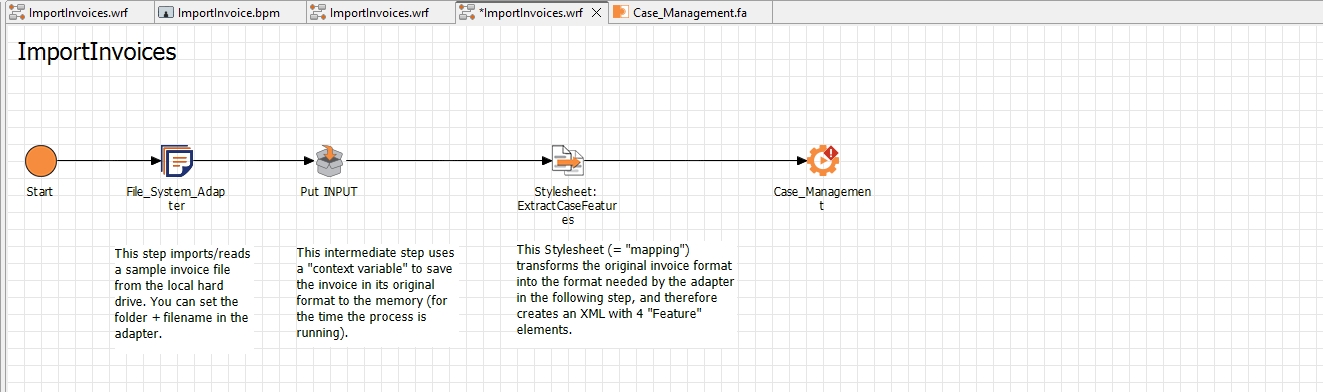
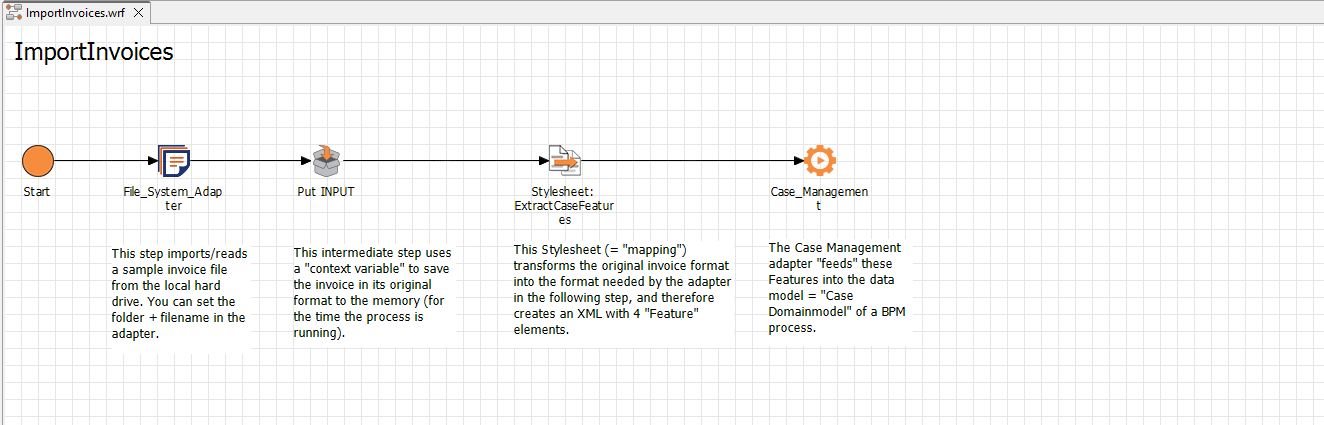
Adding a description
Drag the

Textboxelement from the Palette view next to the
Stylesheet: ExtractCaseFeatureselement in the editor.Double-click the
Textboxelement.
The Text Editor opens.Enter the desired description text, e.g.: “The Case Management adapter "feeds" these Features into the data model = "Case Domainmodel" of a BPM process.”
Click OK.
If necessary, adjust the size and position of the text box.
Next step: Inserting an End Point