Creating, Inserting, and Configuring a Mapping
In this step, you create a so-called mapping or XSL Stylesheet and insert it into your Technical Process in order to further process the data cached using the variable. The created mapping should convert the original invoice format into the required XML format.
After you have created and inserted the mapping in the form of an XSL stylesheet, you can begin configuring the mapping. Only the information from the invoice documents required for checking and forwarding should be read: the invoice number, the invoice amount, the invoice sender, and the date of the invoice.
To do this, you must first import the sample file SampleInvoice.xml into the system as a resource. You should have already created the file in preparation for the example process. For more information on how to create the example file, see Example: ESB Project.
We also recommend that you include descriptions of your Technical Process that explain each process step. This way, the individual process steps remain transparent and can also be quickly followed up by new colleagues.
Previous step: Inserting a Variable and Adding a Description
Prerequisites:
You have created the example XML file that was to be prepared and saved it locally. For more information, see Example: ESB Project.
Importing the example file as a resource
Right-click the Resources folder in the project structure.
Click Import….
The Resource Import Wizard dialog opens.Click on Browse… and select the SampleInvoice.xml file on your computer.
✅ The imported file is displayed in the Resources folder in the Projects view.
Creating the mapping
Right-click the Technical Process in the Projects view and select New > XSL Stylesheet….
The File Creation Wizard dialog opens.If necessary, you can customize the name of the stylesheet in the File name field.
Click Finish.
✅ The stylesheet is created in the ESB Project and opens automatically in the editor. The next step is to further configure the inserted stylesheet.Return to the Technical Process
ImportInvoices.wrf.
Inserting the mapping
Drag the

Mappingelement from the Palette view next to the
Put INPUTelement in the editor.Click the element.
Enter a name in the Label field in the Properties view, e.g.
Stylesheet: ExtractCaseFeatureselement.Click the
button in the Document field in the Properties view.
The Choose Transform Input dialog opens.Select the previously created XSL file
stylesheet.xsl.Click OK.
Deactivate the
Empty Inputcheckbox in the Properties view.
If this option is active, the mapping does not use the data from the previous process step.
Select the
Remove X4 Processing Instructionscheckbox in the Properties view.
If this option is active, all X4 Processing Instructions are deleted from the result.
Click on the lower right
 corner of the
 Put INPUTelement, hold down the mouse button, and drag a connection to theStylesheet: ExtractCaseFeatureselement.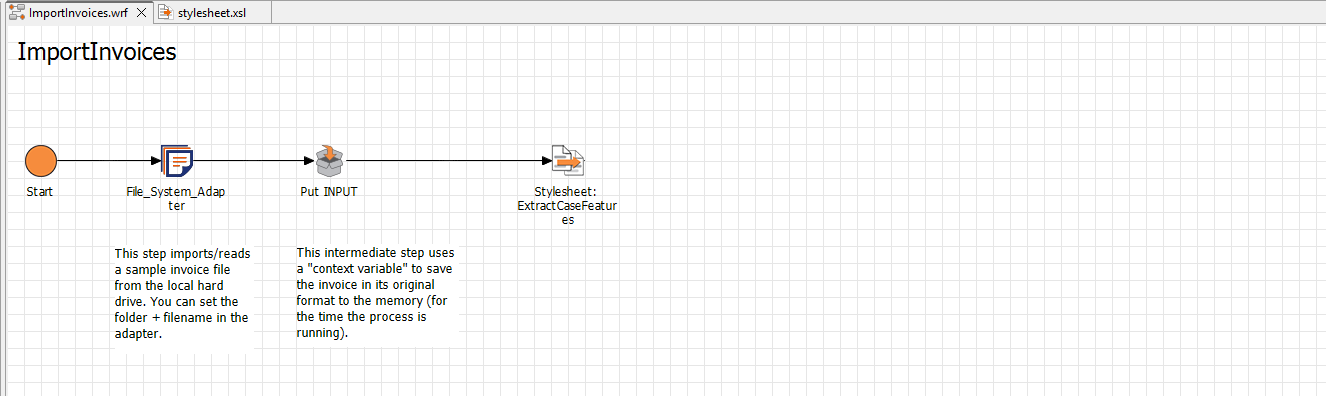
Configuring the mapping
Double-click the
Stylesheet: ExtractCaseFeatureselement in the Technical ProcessImportInvoices.wrf.
The linkedStylesheet.xslfile opens in the editor.Drag the imported
samleInvoice.xmlfile from the Projects view to the leftpane of the
Stylesheet.xslfile.
✅ The XML structure of the file is displayed in the left pane of theStylesheet.xslfile.Right-click the
template match="/"entry in the right pane of thestylesheet.xslfile and selectSelect
As Childfrom the Location drop-down list and specify a name for the element, e.g.Features.Right-click the Features element in the right pane and select
Element.
Select
As Childfrom the Location drop-down list and define the name of the element:InvoiceNumber.Right-click the
InvoiceNumberelement in the right pane and selectAttributes.
Select
As Childfrom the Location drop-down list and define the name of the attribute:type.Enter the value
Stringin the Value field.Right-click the Features element in the right pane and select
Select
As Childfrom the Location drop-down list and define the name of the element:InvoiceAmount.Right-click the
InvoiceNumberelement in the right pane and selectSelect
As Childfrom the Location drop-down list and define the name of the attribute:type.Enter the value
Decimalin the Value field.Right-click the Features element in the right pane and select
Select
As Childfrom the Location drop-down list and define the name of the element:InvoiceSender.Right-click the
InvoiceNumberelement in the right pane and selectSelect
As Childfrom the Location drop-down list and define the name of the attribute:type.Enter the value
Stringin the Value field.Right-click the Features element in the right pane and select
Select
As Childfrom the Location drop-down list and define the name of the element:InvoiceDate.Right-click the
InvoiceNumberelement in the right pane and selectSelect
As Childfrom the Location drop-down list and define the name of the attribute:type.Enter the value
DateTimein the Value field.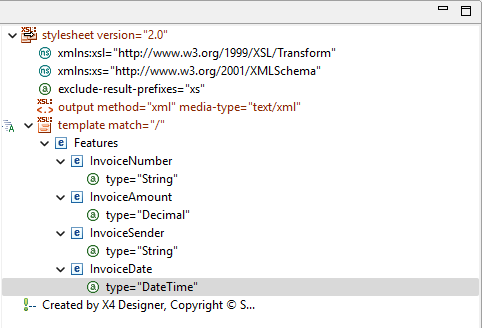
Click an element in the XML structure in the left pane, hold down the mouse button, and drag the element to the element on the right you want to map the element to, for example,
InvoiceNumber(left) drops toInvoiceNumber(right).
✅ A green connection line graphically indicates the mapping.Repeat the step until all necessary fields on the left side are mapped to their counterpart in the right area. For this example, these are the
InvoiceNumber,InvoiceDate,InvoiceTotal, andNamefields.
Click
Save.
Return to the Technical Process
ImportInvoices.wrf.
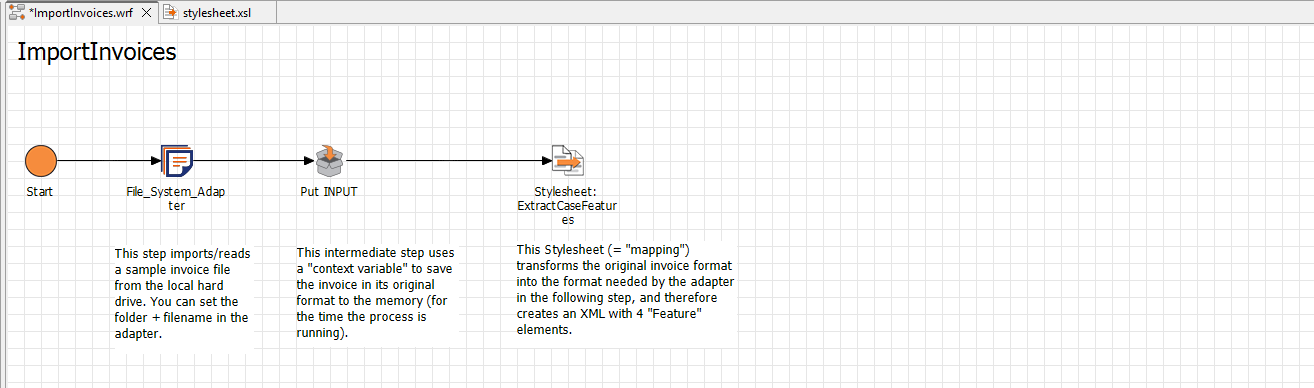
Adding a description
Drag the
Textboxelement from the Palette view next to theStylesheet: ExtractCaseFeatureselement in the editor.Double-click the
Textboxelement.
The Text Editor opens.Enter the desired description text, e.g.: "This stylesheet (= "mapping") transforms the original invoice format into the format needed by the adapter in the following step, and therefore creates an XML with 4 "Feature" elements."
Click OK.
If necessary, adjust the size and position of the text box.