Buiness process data represent the required data structure of the business data used in the Business Process.
We recommend creating business process data of you want to integrate Technical Processes in your BPM process and want to work with a predefined data structure in these Technical Processes. For the example process described here, the business process data is required to create a decision table and an associated rule. For more information, see Creating a Decision Table and Inserting a Rule .
You define this data structure using so-called domain model files (.domainmodel). You use domain model files to create a three-level hierarchy for the business data, including corresponding descrptions, and thus add them to the process definition.
Notes:
-
If you want to use the business process data for more than one Business Process, you need to create the
.domainmodelfile in the Activities > DomainModel repository folder. -
If you want to use the business process data for a specific Business Process, you need to create the
.domainmodelfile directly subordinate to the Business Process. After saving, the file is immediately attached to theStartevent of the Business Process. -
For more information on domain model files, see Managing Domain Models.
How to define business process data
Previous step: Creating Pools and Lanes
-
Right-click the
ImportInvoicesBPM Project in the Projects view and select New > Domain Model… to create a DOMAINMODEL file and define business process data.
✅ TheCase.domainmodelfile is created and opens automatically in the editor. -
Click Add… to add a new category and enter the name
InvoiceDatain the Name field. -
Click Add… again to add a new group and enter the name
InvoiceHeaderDatain the Name field. -
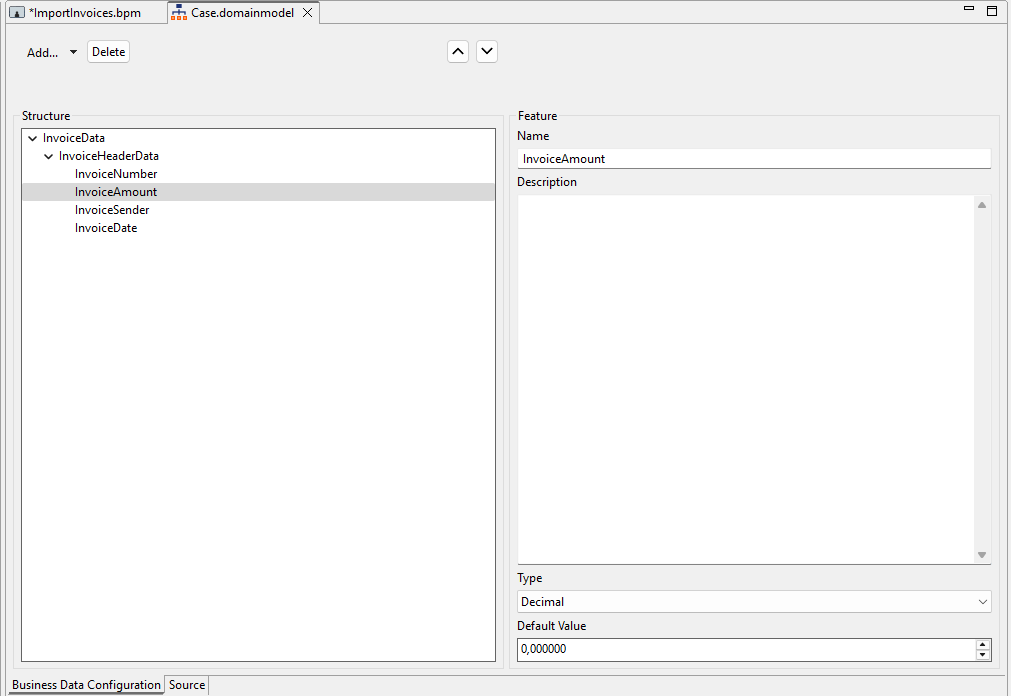
Select the
InvoiceHeaderDatagroup in the Structure area, click Add… > Feature, and define the following features:
|
Name |
Type |
|---|---|
|
|
|
|
|
|
|
|
|
|
|
|
-
Click
Next step: Defining Case States