Adopting the Proxy Configuration in Keycloak
Once the root URL is set, the next step is to add the proxy configuration in Keycloak.
In the installation directory of the X4 Server, open the keycloak/conf/keycloak.conf folder and perform the following steps:
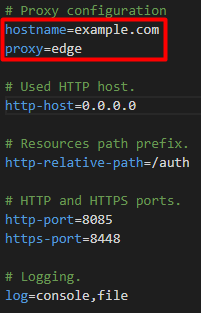
Define the hostname based on your external URL:
hostname=example.com.Add the proxy configuration option:
proxy=edge.Set the value of the
http-hostconfiguration option accordingly to allow external communication. You can use the default valuehttp-host=0.0.0.0, but this provides only limited security.
Note:
After you have performed these steps, the Keycloak Administration Console is not available on the local computer. If you need to access the console, you must reset these settings. For more information on restoring the local access to the Keycloak Administration Console see the Bekannte Probleme section.
After the setup, the configuration in the keycloak.conf file should look as frollows (only enabled configuration options are shown):